DIY Projects/Mods - Interior
Window Tint
Tinting your windows is almost a no brainer. It looks nice and saves on A/C
and fading of your interior. Is this a DIY project? Yes and No, as it depends on
you skill level. On my cars I leave it to the pros as they have the best tint and
most important the SKILLS.
Before you go and put "Limo Tint" on think about what it will cost you if you get
a ticket.
- Cost of the ticket
- Cost to remove the tint
- Cost to install the new tint
- Your time
Most states have a min and/or max light levels on the tint depending on which window you look at. I have been stopped and actually had them take out a light meter to check the tint. In Texas the the yearly state inspection is suppose to check the tint level on your car.
Being that I live in central Texas and the summers can really get hot, over a 100°, tinting your windows is almost a must. My 83 came with "factory tint", which is almost worthless. I put "legal" tint on the drivers and passenger side glass, 1 shade darker for the quarter glass and rear window. The tint I had installed removes 95% of the UV and reduces the heat by about 50%. I had mine done by Made In The Shade a local company that does tinting onsite. Gabe, the owner, has been doing tinting for 28 years and is a real pro. Could I have done it myself? Yes, but the cost savings would have been small and I would have no warranty.
BEFORE
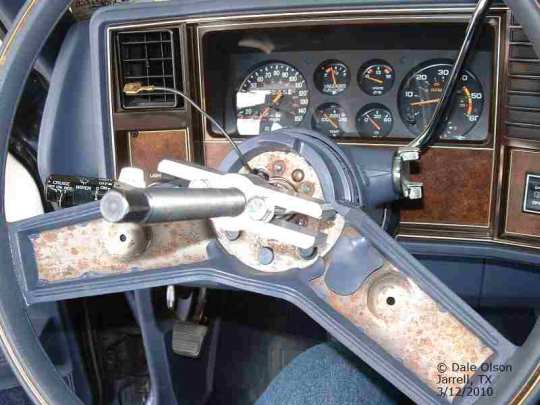
Steering wheel Swap
The 1983 Monte Carlo SS was based on the standard Monte Carlo chassis. The interior was the same as the standard Monte Carlo except for the seats.The front seats had the SS on the headrests.
The stock steering wheel does not imply that it is an SS and was kind of ho hum to boot. In 1984 (my 1st SS was a NEW 1984 SS) they added a leather wrapped steering wheel and an nice round horn button with the Chevrolet logo in the center of the horn button. I decided to swap steering wheels.
Before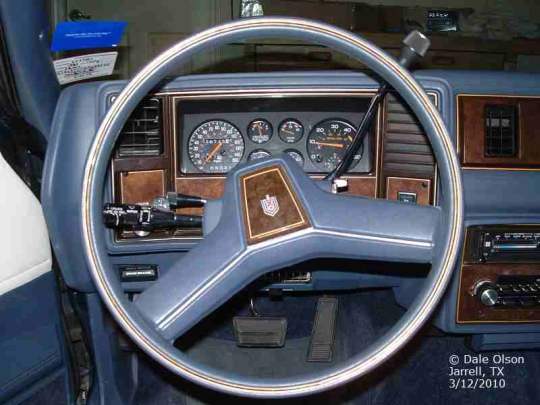

First you need to center the steering before you do anything. Next remove the horn cover on the old steering wheel. There are 2 small screws on the back of the steering wheel. Once you have them out it just lifts off. Next disconnect the horn wire. Remember,it's hot so if you touch it to any metal parts of the steering wheel the horn will honk at you! Of course you can always disconnect the battery.
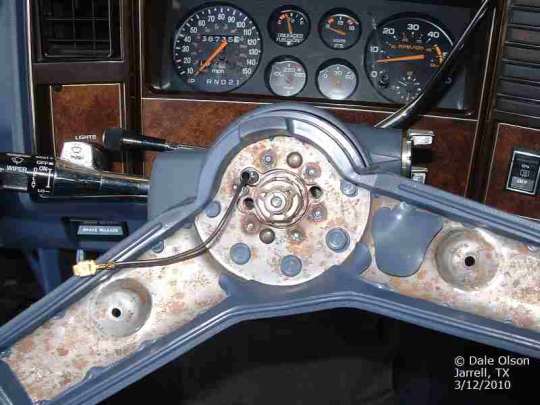
Next remove the snap ring from the shaft.
Next remove the nut that secures the steering wheel to the shaft.
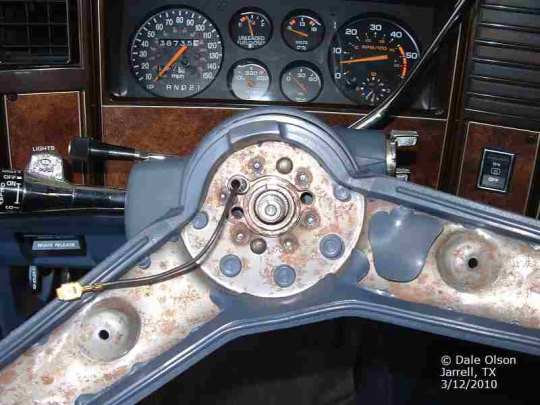
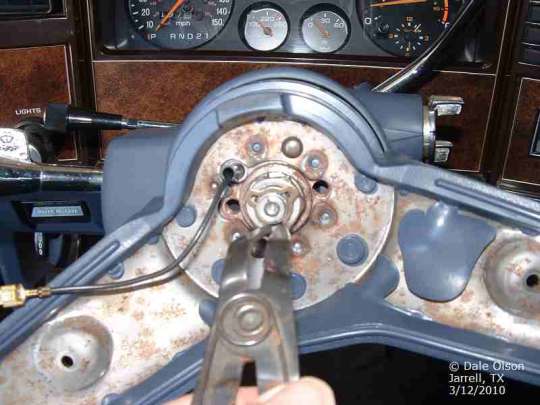
Now comes the fun part, pulling the steering wheel. You can borrow a puller from most auto parts stores. I got one from O'Reilly's. But, I found that NONE of the bolts fit the tapped holes used to pull the steering wheel.
Considering that in the 80's the auto industry was in the process of converting to the metric system I figure that the holes were metric. So, I took the 84 steering wheel to Home Depot to get a couple of bolts. What I found was the holes were tapped for 7mmx1.0. This is an oddball size as most stores that carry metric bolts have 6mmx1.25 or 8mmx1.25. I checked the puller bolts and the next SAE size up from 7mm was 5/16. But, they used a FINE thread bolt, 5/16x24 over the more common 5/16x18. So, just went to my shop and picked up my tap & die set and re-tapped the holes.
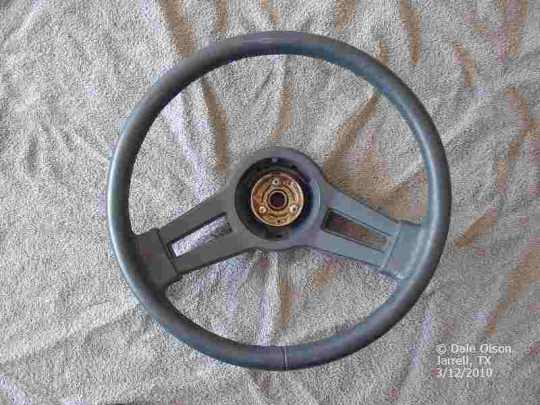
Once the old steering wheel is off you can install the new 84 SS steering wheel.
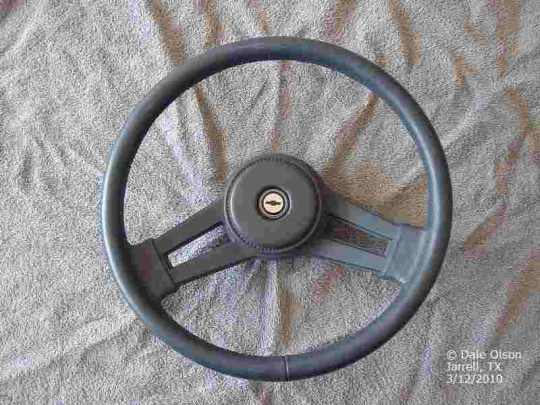
Remove the horn button. Be gentle as the retaining tabs are PLASTIC and they will break.
Next remove the 3 screws that hold the "horn cup" on to the steeing wheel. You should note that there is a plastic ring connecting the 3 screws. This ring has 3 legs that insulate the cup from the steering column. IE - It makes the horn work.
Now remove the horn button spring. The steering wheel is ready to install. But, before you actually install the steering wheel you will need to do a couple of modifications.
- The horn button wire needs to changed. There is a small plastic connector that needs to trimmed as it interferes with the new horn button spring.
- You will need either drill a bigger hole in the horn button cup to allow the connector on the end of the wire to pass thru or cut the connector off. I did both.
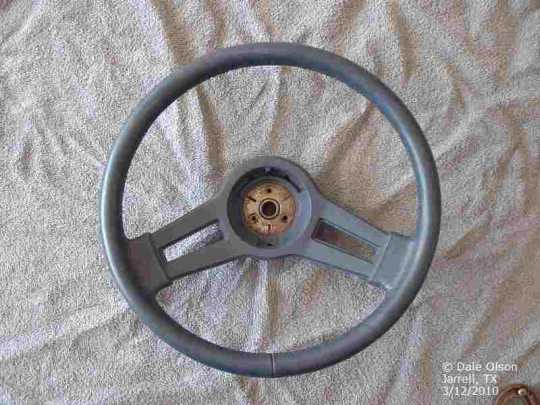
Now install the steering, be sure to center it first, and route the horn wire through the hole in the steering wheel. Replace the retaining nut and install the snap ring.
Next, install the horn button spring a route the horn button wire through one of the slots.
Next replace the horn button cup and route the horn button wire through the hole you drilled out. Be sure the plastic legs are properly positioned in the horn button spring, slip the horn button wire under the plastic ring and tighten down the screws. Reinstall the horn button. If you have done everything correctly the horn should work and the steering wheel should be centered and secure.
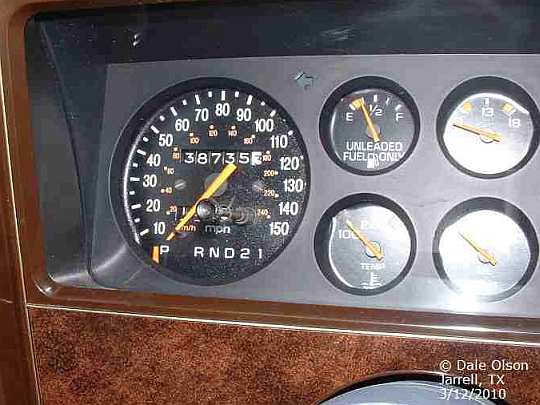
Speedometer Upgrade
For those that don't know the Monte Carlo SS came standard with an 85 MPH speedometer. Not very impressive considering the name badge. But, back in the day GM, along with the rest of the auto makers, were being beat up by the FED's after producing very big HP cars over the previous years.
So, how do you fix the problem. Well, you could hunt the junk yards and look for some old police cars. Some had 200 MPH speedo's. But, they are long gone by now. The next option is to get an overlay and get speedometer re-calibrated. You can get a 120 mph or 140 mph from Dixe Monte Carlo or Lauren Engineering.
What did I do? Nothing it was already done when I got the car. According to the guy I bought it from he said it came out of Corvette or so he was told.
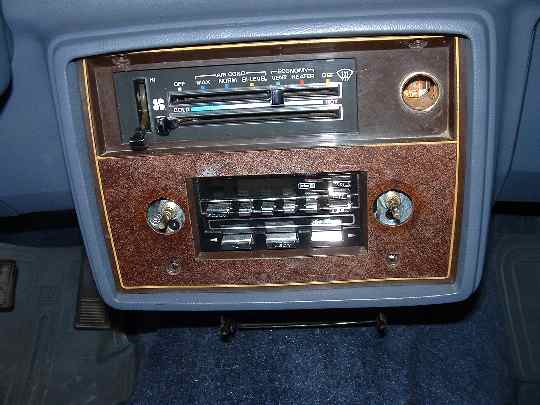
Radio Upgrade
Like 99% of SS owner's I replaced the stock radio with new modern version.
Before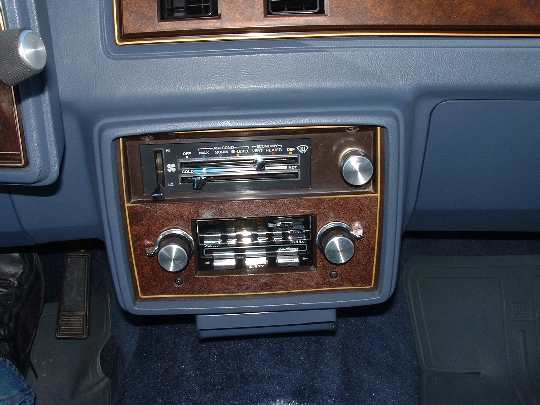
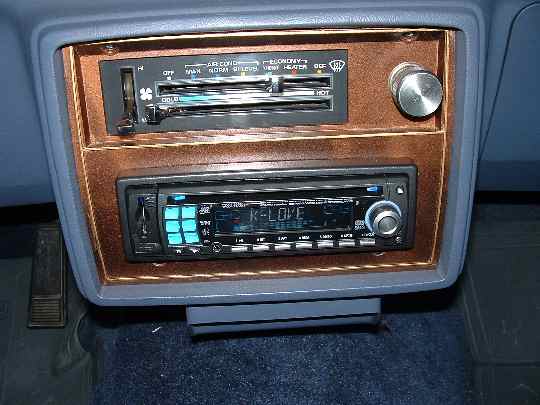
So which one do you buy, the low priced one or the expensive one? I opted for a low priced one that was on-sale for $75 (regular price was $150). If your an audio file type then go the audio shop and break out you wallet. The one I installed has:
- CD Player
- SD Card Reader
- USB Input
- Aux In - Ipod
- Sub Woofer Out
- Sub Woofer Bypass
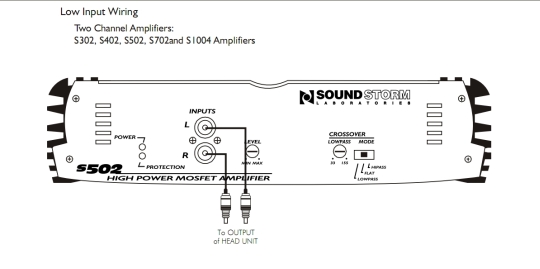
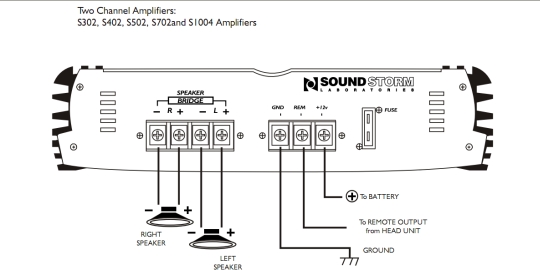
But, the head unit is only part of the upgrade. You really need to upgrade the speakers, maybe add a sub woofer and upgrade some of the wiring. As I am the 3rd owner, the sound system was updated and then returned to stock. But, the speakers were not returned to the 1983 version even though the original parts were saved and available. Here is a photo of the parts I used. The first owner added the Infinity front speakers and the Kenwood rear speakers. He also left a 200-watt S402 Sound Storm Labs 2 channel amp in the trunk. This amp is really old by today’s standards. But, for the interim I decided to hook it up to 2 10" sub woofers.
Parts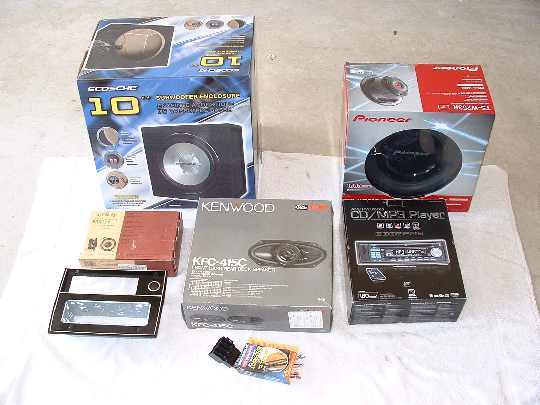
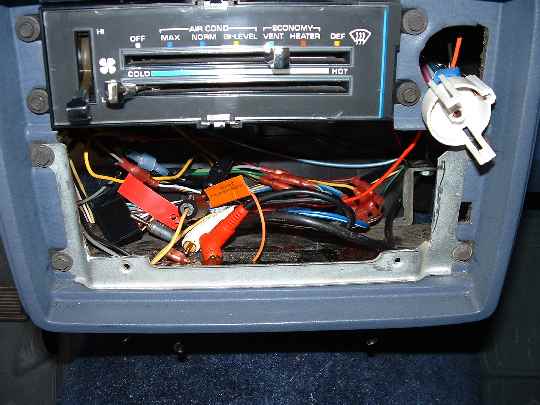
Start by removing the radio controls and cigarette lighter.
Now remove th 4 screws that hold the face plate on.
NOTE - you will need
to realease the cigarette lighter connector.
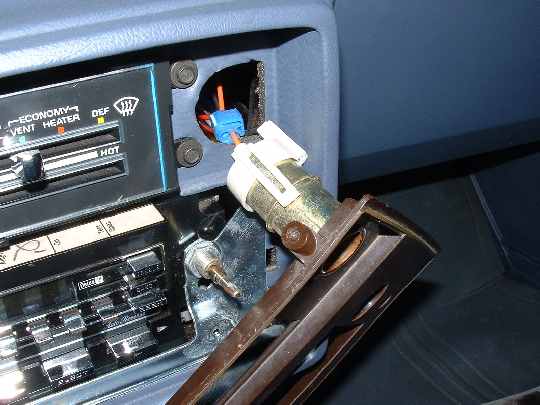
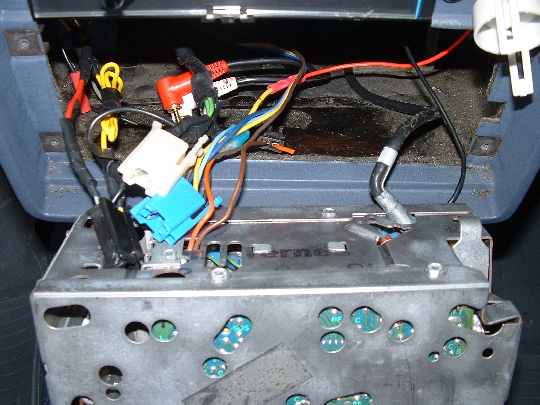
Remove the 4 screws that hold the radio-mounting bracket to the center console, remove the radio and disconnect the factory plugs.
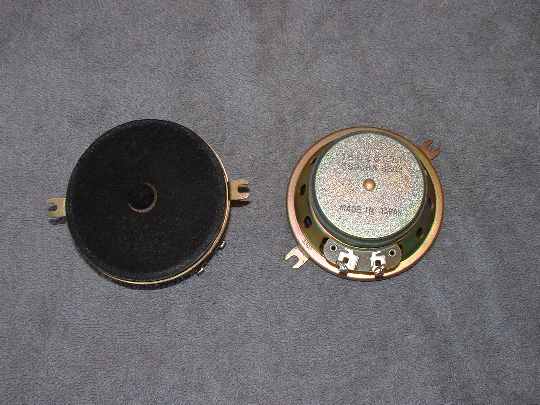
Now that the radio is out it time to remove the speakers. The front speakers can be pain change out, as you don't have much room to the remove the screws that hold the grill covers in. Once the grill covers have been removed, remove the 2 screws that hold the speakers in and disconnect the speaker wires. Be sure to mark the + and - wires so you can connect the new speakers with correct polarity. This is important as it affects the sound quality. Also, remember that GM does NOT use chassis ground for the speakers. Install your new speakers and reinstall the grill covers.
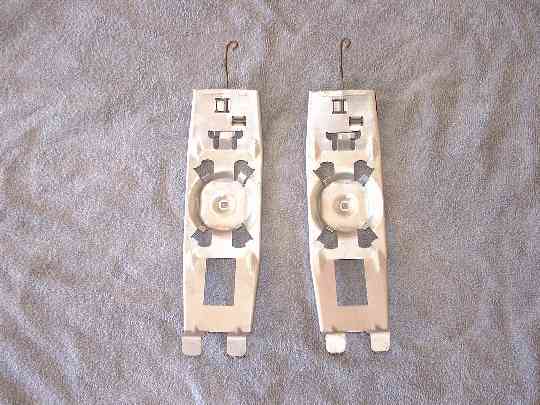
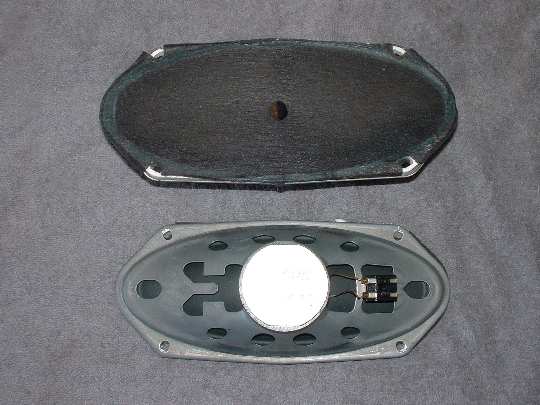
The rear speakers are held in with a bracket. Just move the retaining clip and the bracket and speaker drops down. Remove the speaker wires and you ready to install your new speakers. Again, remember to mark the + and - on the speaker wires so you can maintain the correct polarity when you install the new speakers. You can either install new 4x10's or get a 4x10 to 6x9 adapter and install some 6x9's.
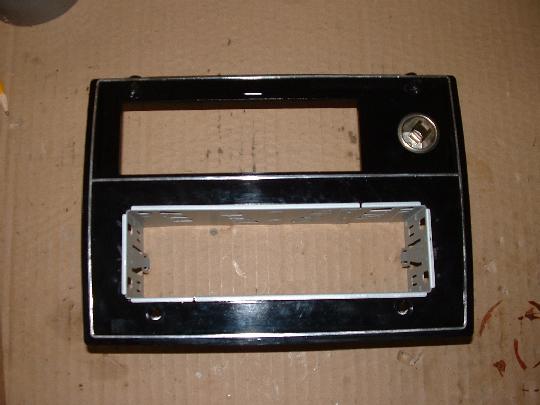
Now that the speakers are done it's time to install the radio. It's decision time! To install the new radio you will have to cut/modify the radio mounting bracket and face plate or get duplicates on the off chance you may want to return it to stock. Me, I opted for duplicates.
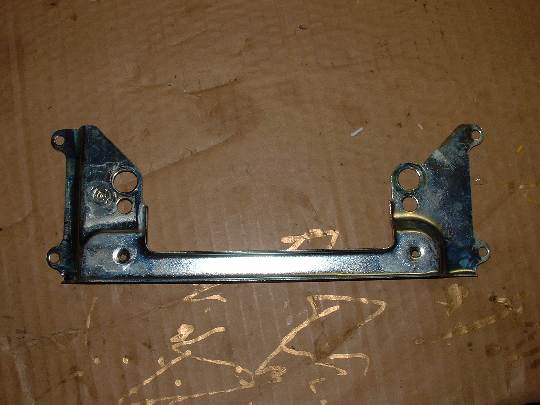
You will need to remove the entire old 2-dial portion of the bracket as shown in the photo below. The reason for modifying the mounting bracket is if you don't there is nothing to hold the 2-bottom faceplate mounting screws.
You will also have to remove the 2-dial portion of the faceplate. Do this in stages as the new radio mounting bracket needs to fit as tight as possible and not be bent out of shape or distorted otherwise the radio will not fit correctly or will come loose from normal vibration of the car.
I did not like the black faceplate so I decided to try and match the original dash colors. I got a can of Copper Hammer paint at Wal Mart and sprayed a light coat on the faceplate and allowed some black to show through. After spraying 2 light coats on and it was just about perfect. I used a Gold Paint pen to add the trim color to the faceplate so it matches the rest to the dash trim.
Trial Fit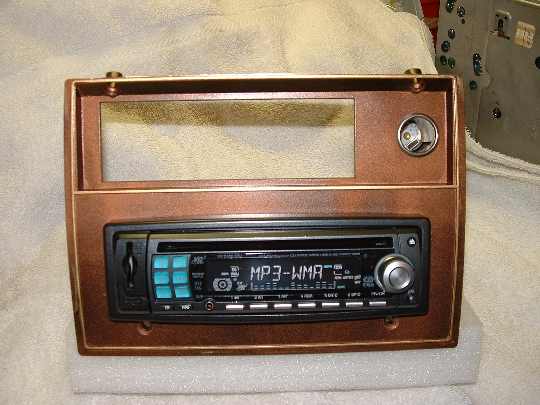
Now it was time to wire in the new harness. Under normal conditions you can get a $6 GM adapter at Wal Mart, wire the new radio to it and plug in the original GM plugs. But mine had been cut up pretty bad. So, I wired in some insulated quick disconnects and I was good to go.
Being that someone had already run power and RCA plugs to the rear to connect
the sub woofer I didn't have to do that job. Had I done this I would have run a
#10 or larger wire directly from the battery to the trunk and added a fuse
holder.
NOTE - There is a wire channel on the driver's side rocker
panel just for this purpose.
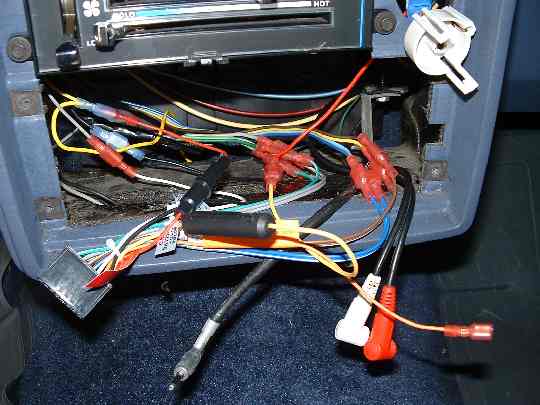
Now it's just a matter of plugging in the connectors, remount the radio and test the system.
Just follow the directions.
The sound is great.. The radio does not over power the speakers even on very high volume. The sub woofers thump when you have them turn on and crank up the volume.
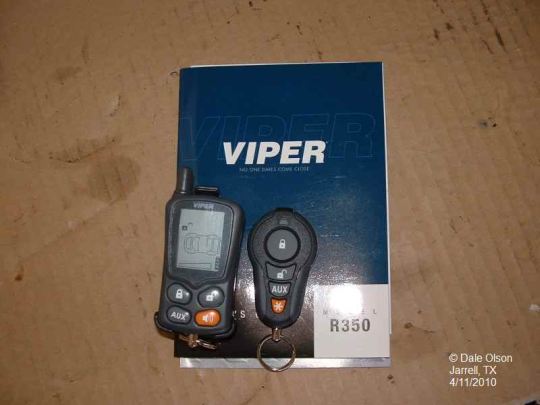
Viper Secuity Alarm
Now that I have added a few things like new wheels/tires, window tint and new stereo system etc I figured I best put some sort of security system in. Will an alarm system stop a professional thief? No, but it may slow them down.
I went to a local shop recommended by my tint guy. I just happens to be the place he work's out of. So I decided to check them out, went down to AUDIO FX and talked to the sales guy Russell. After discussing the various features I decided to get an alarm system with 2 remotes. One is the standard key fob type and the other is a small LCD that clips to your belt. This system has a 2 stage shock sensor, ignition lock out, controls the door locks, hood/trunk and can be wire to the trunk opener if you have one. 2012 Update Audio FX is out of business.
Of course the actual install was done by the owner, Scott Williams. Scott is also a car nut. His passion is the Impala SS. He runs the Impala SS Forum.
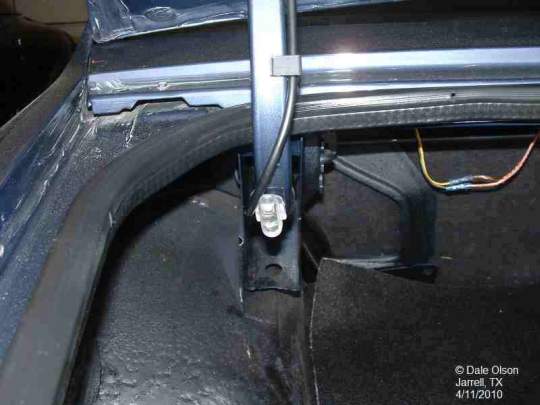
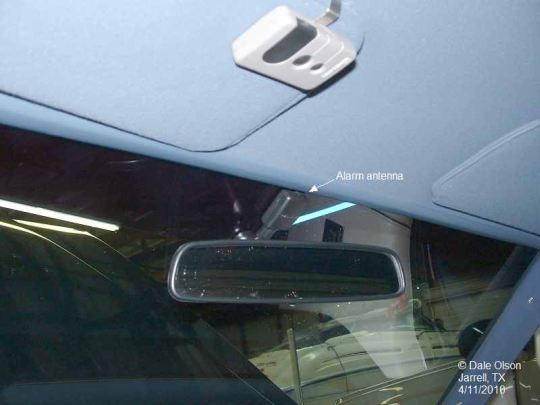
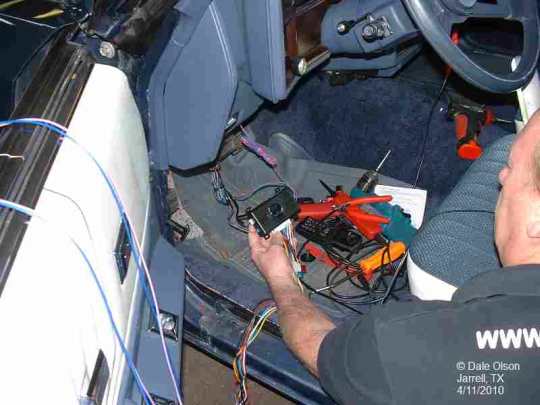
InstallFirst thing that gets installed is the antenna. It's small and unless you look for it you don't even see it. Scott hides wires under the headliner molding and down the "A" pillar.
Next to get installed is the alarm control module. Scott wired this into factory wiring just by removing the column panel. Scott does NOT use any crimp on connectors per se. He solders them and covers them with shrink tubing. All exposed wires are covered with flex cable covering so it all looks factory.
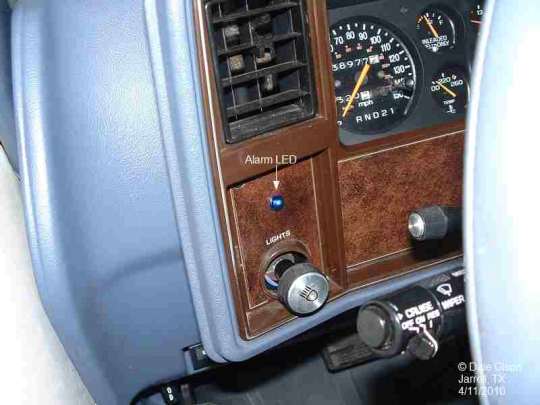
A small LED gets mounted to let anyone looking that the system is armed. At niight it lights up the whole dash area of the car. Kinda cool.
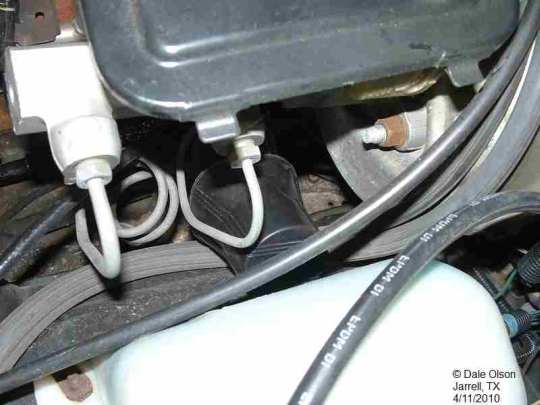
Next to get installed is the speaker, trunk switch and the hood pin. The speaker is really small and Scott tries to put where you are least likely to look for it. The hood pin is mounted in one of the exsisting holes in the radiator brace. The trunk is triggered with a mercury switch as Scott does not like to drill any holes that will leak water into the trunk.
Speaker